The Morose Bee
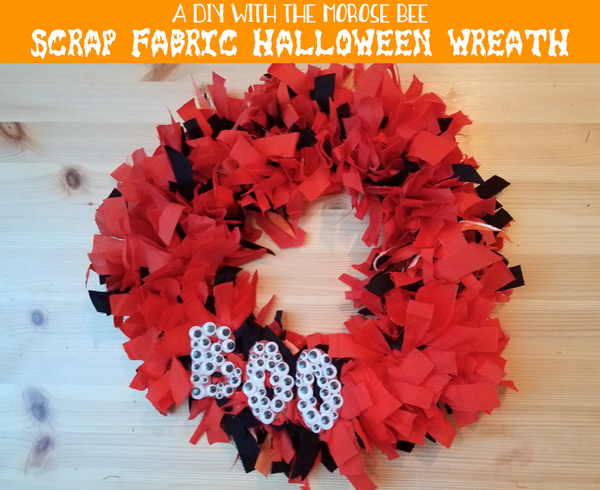 Are you enjoying the first few days of fall?! With the first official day of fall being only a few days ago, I thought something extra special was in order. I feel like it's been a while since I assembled a DIY, but I'm pumped for this one! I made a Halloween Wreath a few years ago, but it wasn't anything exciting so I knew I wanted to make something better for this year's Spooky Saturdays. I purchased very little for this wreath and, because it's made with scrap fabric, could be edited for any occasion or color palette! I saw something similar a while back on Pinterest and after a different project ended up having a lot of leftover orange fabric I knew I had the perfect use for it. 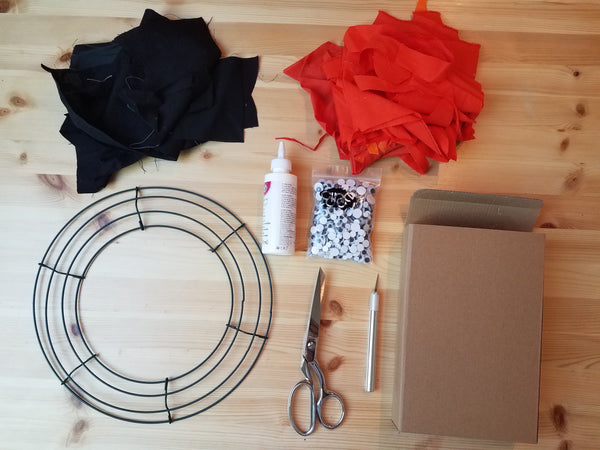 1. Wire Wreath Frame. I ordered this one. 2. Scrap fabric in your colors of choice. The total quantity is probably close to almost a full yard. 2. Fabric scissors 3. Exacto knife 4. Craft glue 5. Hot glue gun (not pictured) 6. Cardboard 7. Writing utensils 8. Googly eyes. First cut your fabric scraps into strips that are about 1/2" wide and 4" long. The size and condition of the strips is super flexible. I just sort of eyeballed it and didn't worry if some were longer, frayed, whatever. You can always trim it up later. Once everything is cut, you start tying them on! When you first start it will seem silly looking, but the more you add, it will start to look more and more like you're on the right track. I didn't really have a "method," I just kept tying! It honestly took almost 2 hours of tying. It wasn't difficult, just tedious. Once the wreath was to a thickness I was happy with, I trimmed up some of the longer pieces and set the wreath to the size temporarily. Using your writing utensil and your scrap of cardboard, Sketch out the letters of your choice. I went with "BOO," but "EEK!" or a family name would work too! I also colored in the letters with the orange Sharpie so it blended a little better with the color palette. Cut out your letters with your Exacto knife. Because I was working on an old box, it was elevated off the table. If you're just using a flat piece of cardboard, don't forget to put down a cutting mat! Using craft glue, spread some around the letters and fill it with Googly eyes! This was my favorite part. I want to put Googly eyes on everything. Wait until craft glue has completely dried before moving on. Use a hot glue gun to attach the letters to the wreath. And that's it! Depending on how you need to hang the wreath, you may want to add another step to put a ribbon or hook on the wreath. I was able to hang mine with just a nail already in my wall, but you may need to do something different. I can't decide if I want to glue plastic spiders to it or something to make it extra kitschy, but I won't be pulling out ALL my Halloween stuff until next week. I have time to decide! I hope you're first few days of fall are lovely! Stay inspired, friends. 
0 Comments
Leave a Reply. |

Hi! I'm Emily.I’m a maker and educator living in Austin, TX. I’m also the gal behind The Morose Bee. Archives
March 2024
Categories |


 RSS Feed