|
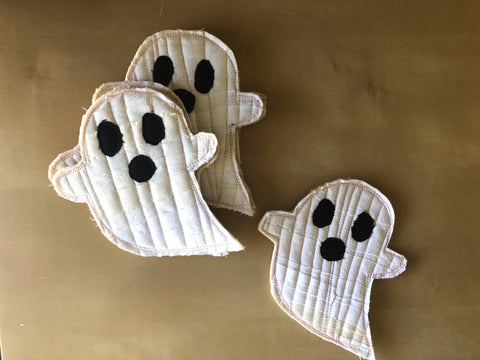
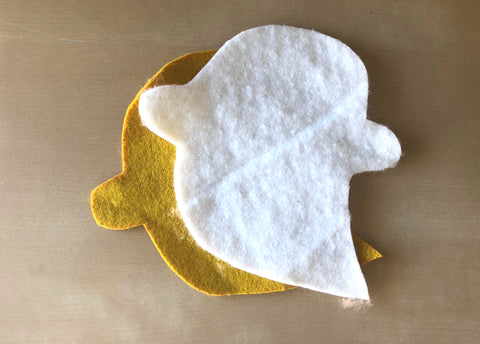
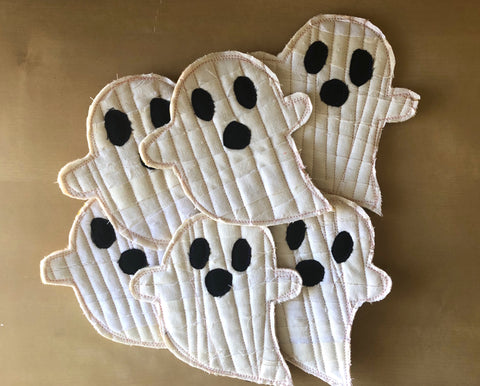
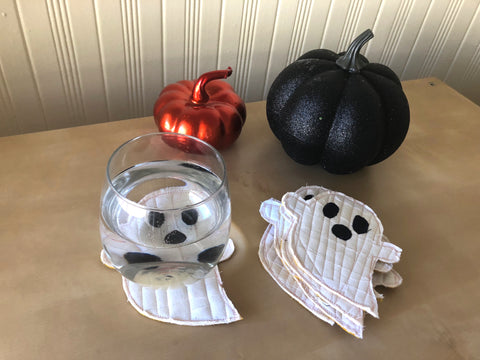
This is a really simple DIY even if you're a newbie at sewing. It involves scrap material and I bet most of you can make these this weekend without buying any new materials! I've made similar coaster to these before and they held up really well over time. I decided to revamp the idea for Halloween! For this project, you will need: -white scrap fabric -black scrap fabric -scrap cotton batting -felt -scrap paper -paper scissors -fabric scissors -chalk marking tool -thread -a sewing machine Step 1: Start with your pattern for the ghost. Using your scrap paper and paper scissors, take a glass from your kitchen and trace around the base so you know you're making your coasters the right size. Sketch your ghost shape around the size of the glass. Cut out your pattern. Step 2: Use the template and your chalk marking tool to trace the ghost shape onto the felt and the batting. I made a set of 6 coasters, but make as many as you want! Just be sure to cut out one piece each of the felt and batting. Step 3: Cut your white scrap fabric into 1/4-3/4 inch strips. I used white, off white, solid, and pattern fabric for these coasters. Make them as mix and match as meets your preference. Step 4: Stack a felt ghost shape, then a batting shape, and then layer the white strips on top. You can add in a few pins if it helps you to keep the strips in place, but I tend to just go rogue and sew without pins! Step 5: Similar to quilting, start in the center and work your stitches out so the fabric stays flat. Press down with your hands as you go. The amount of stitches you do is flexible since these are only coasters. I did about 12 stitches on each ghost, but have fun with it! If you love the quilted texture, add more!
You can use any light colored thread that floats your boat for this part. I actually used a very light pink! In hindsight I wish I would've used a light lavender thread that I have as I think purple is much more Halloweenie than pink, but I'm still super happy with my coasters! Step 6: After your sewing is done, trim the excess white fabric away. Step 7: Sew around the edges of the ghost shape. I went around each ghost 2-3 times because I like the look of it. Only once is really necessary. The most important thing is to make sure your stitch over perpendicular to your other stitches so they lock into place and keep the ghost from fraying too much over time. Step 8: Use your black fabric to cut out your ghost faces. Have fun with it! I did a simple mouth and eyes, but there are so many choices! I sewed my face features on with dark purple thread, but you could probably cheat with fabric glue if you wanted to! Step 9: Double check all your ghost friends for any last minute loose threads or final touches. And that's it! I hope that you enjoyed this special little treat we've put together for you! If you end up making these coasters, we'd love to hear from you about how it went. You could probably make skulls using the same materials and technique! HAPPY OCTOBER Y'ALL!
0 Comments
Leave a Reply. |
Hi! I'm Emily.I’m a maker and educator living in Austin, TX. I’m also the gal behind The Morose Bee. Archives
March 2024
CategoriesThis website uses marketing and tracking technologies. Opting out of this will opt you out of all cookies, except for those needed to run the website. Note that some products may not work as well without tracking cookies. Opt Out of Cookies |


 RSS Feed